How to use the Scroll Bar
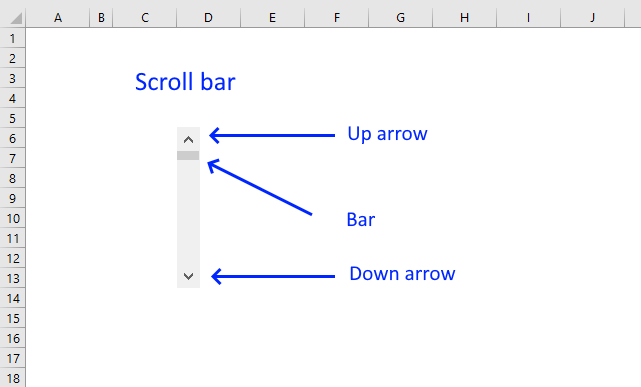
This article demonstrates how to insert and use a scroll bar (Form Control) in Excel. It allows the user to scroll through a smaller section of the data set using the arrows or press and hold on the bar and then drag.
This enhances the user experience and makes the worksheet easier to use. The scroll bar can also be used to manipulate a dashboard or a chart.
This particular scroll bar is a Format Control scroll bar and there are several other tools in the Format Controls group that you can use as well, however, I will only describe the scroll bar (Format Control) in this article. The other group is ActiveX Controls and often requires VBA code to manipulate and use.
What's on this page
1. Introduction
- What is a scroll bar?
A scroll bar is a control that allows users to navigate through a range of values by press with left mouse button oning arrows or dragging a slider. Scroll bars can be added as part of a Form Control or ActiveX Control and are useful for creating interactive dashboards and forms. There are two types of scroll bars in Excel:- Worksheet Scroll Bars – The default horizontal and vertical scroll bars that help navigate through large worksheets.
- Form Control Scroll Bar – A customizable scroll bar that can be linked to a cell to adjust values dynamically.
I am going to demonstrate how to work with scroll bars (form control) below in section 2.
- What is a Form Control?
Form Controls are built-in user interface elements in Microsoft Excel and other Microsoft Office applications that allow users to interact with spreadsheets or documents. These controls include buttons, checkboxes, dropdown lists, scroll bars, and more. Form Controls are relatively simple and are linked directly to spreadsheet cells, allowing for easy data manipulation without the need for complex coding.- Simple to use and configure.
- Work with Excel’s built-in macros and formulas.
- Do not require programming knowledge (VBA is optional).
- Faster and more lightweight compared to ActiveX controls.
- Limited customization options.
- What is an ActiveX Control?
ActiveX Controls are more advanced and customizable user interface components that can be embedded in Microsoft Office applications and other Windows-based software. They provide greater flexibility and functionality than standard Form Controls.- More advanced customization options (e.g., changing fonts, colors, and behavior).
- Can be manipulated using VBA (Visual Basic for Applications).
- Offer dynamic and interactive features beyond Form Controls.
- Can be used in various applications beyond Excel (such as Word and Internet Explorer).
- Require more system resources and may have security risks when running external code.
What are the differences between form controls and ActiveX controls?
- Form controls are not as flexible as ActiveX controls but are compatible with earlier versions of Excel.
- Form controls work across different versions of Excel, including Mac unlike ActiveX controls which may not work on Mac.
- ActiveX controls support events, enhancing their functionality. In contrast, Form controls allow macros to be assigned which run when a user selects a value. While assigning a macro to a Form control is optional, it adds flexibility.
How to enable developer tab?
Here is how to enable the "Developer" tab if it is missing on the ribbon:
- Press with left mouse button on "File" located above the ribbon, a new pane appears.
- Press with mouse on the "Options" button to access Excel settings.
- Press with mouse on "Customize Ribbon" and then on the right side press with left mouse button on the checkbox next to the tab "Developer" to enable it.
- Press with left mouse button on "OK" button to apply changes.
The "Developer" tab is now visible on the ribbon. Here are instructions for Excel 2007, Excel 2010 and Excel 2013
2. Insert Scroll Bar
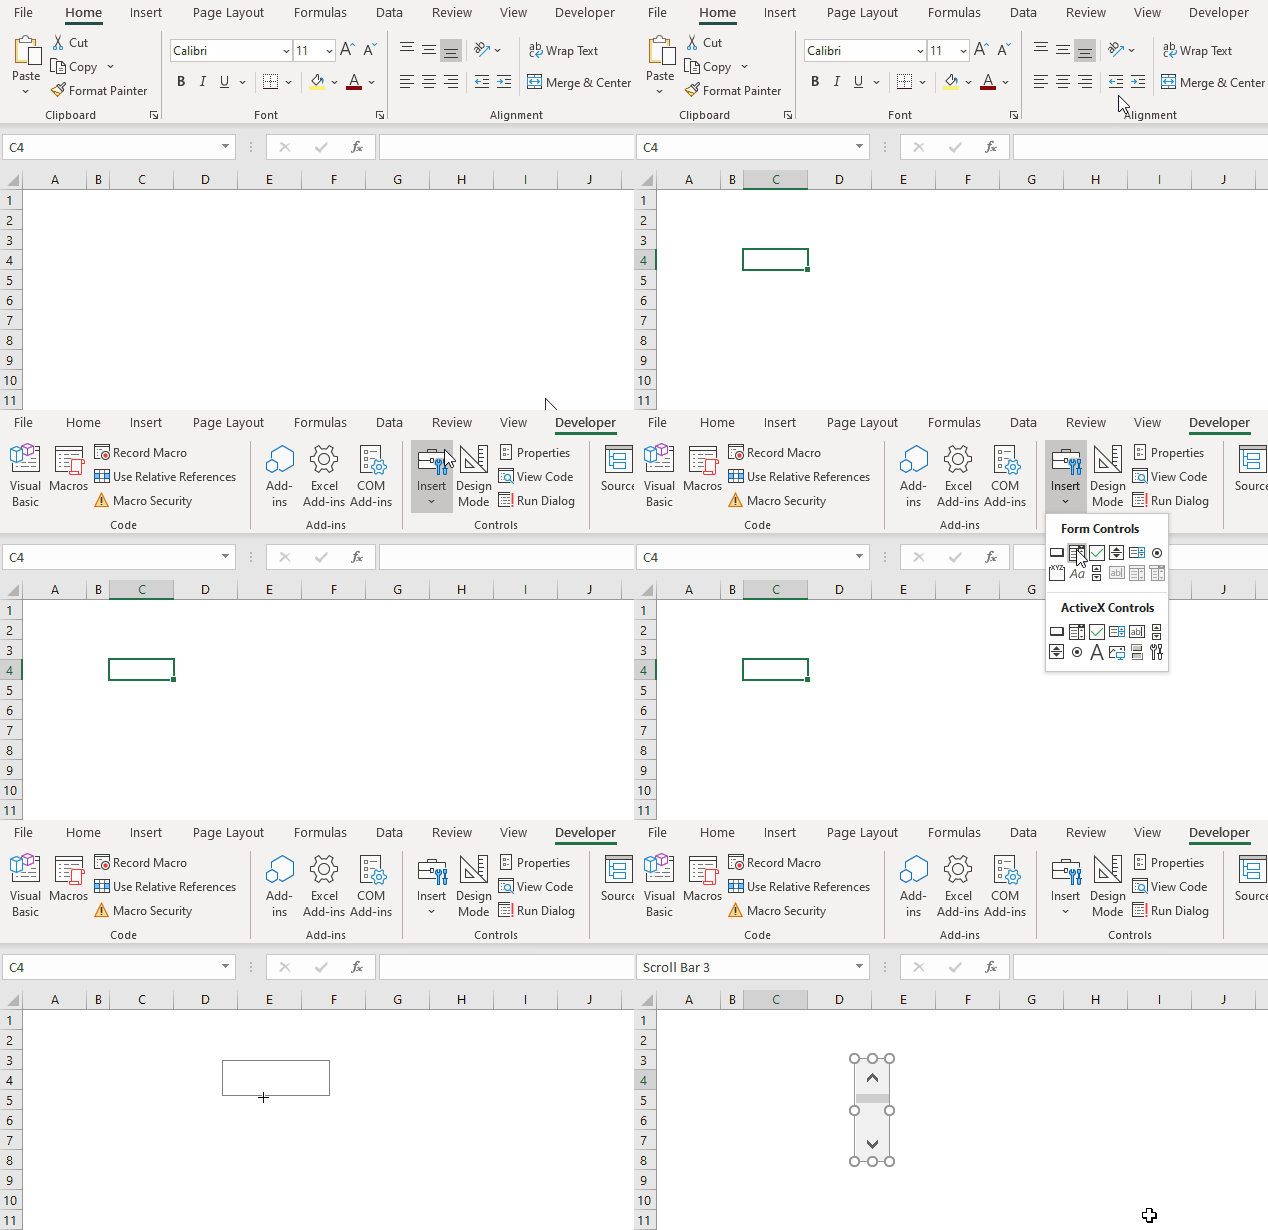
The animated image above demonstrates how to insert a scroll bar.
- Go to tab "Developer" on the ribbon. Search for "Show the Developer tab" and your Excel version in your favorite search engine if your Developer tab is missing.
- Press with left mouse button on the "Insert" button and a pop-up menu appears.
- Press with left mouse button on the "Scroll bar" button.
- Press and hold with left mouse button on the worksheet.
- Drag with mouse to size the Scroll Bar.
- Release left mouse button to create the Scroll Bar.
3. Position and resize a Scroll Bar
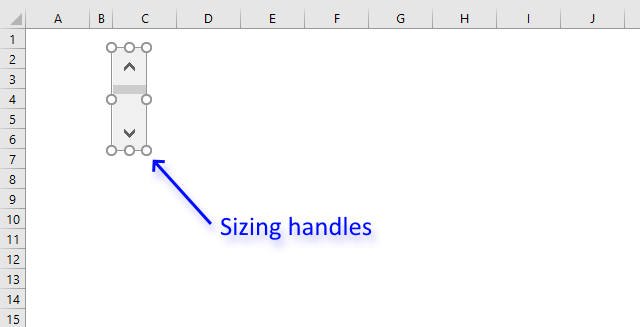
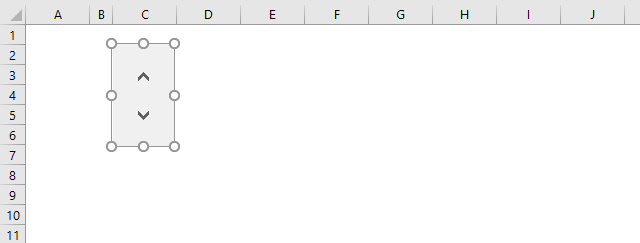
The image above shows a selected Scroll Bar and the sizing handles.
- Press and hold CTRL key.
- Press with left mouse button on with left mouse button on the Scroll Bar, release the CTRL key.
- The Scroll Bar is now selected, you can tell it is selected by the sizing handles that now has appeared.
There is a handle in each corner and one on each side of the Scroll Bar. In total eight handles. - Press and hold with left mouse button on the selected Scroll Bar.
- Drag with mouse to place the Scroll Bar on a new location.
Go to the new worksheet, press with right mouse button on on the location you want it to appear. Press with left mouse button on "Paste".
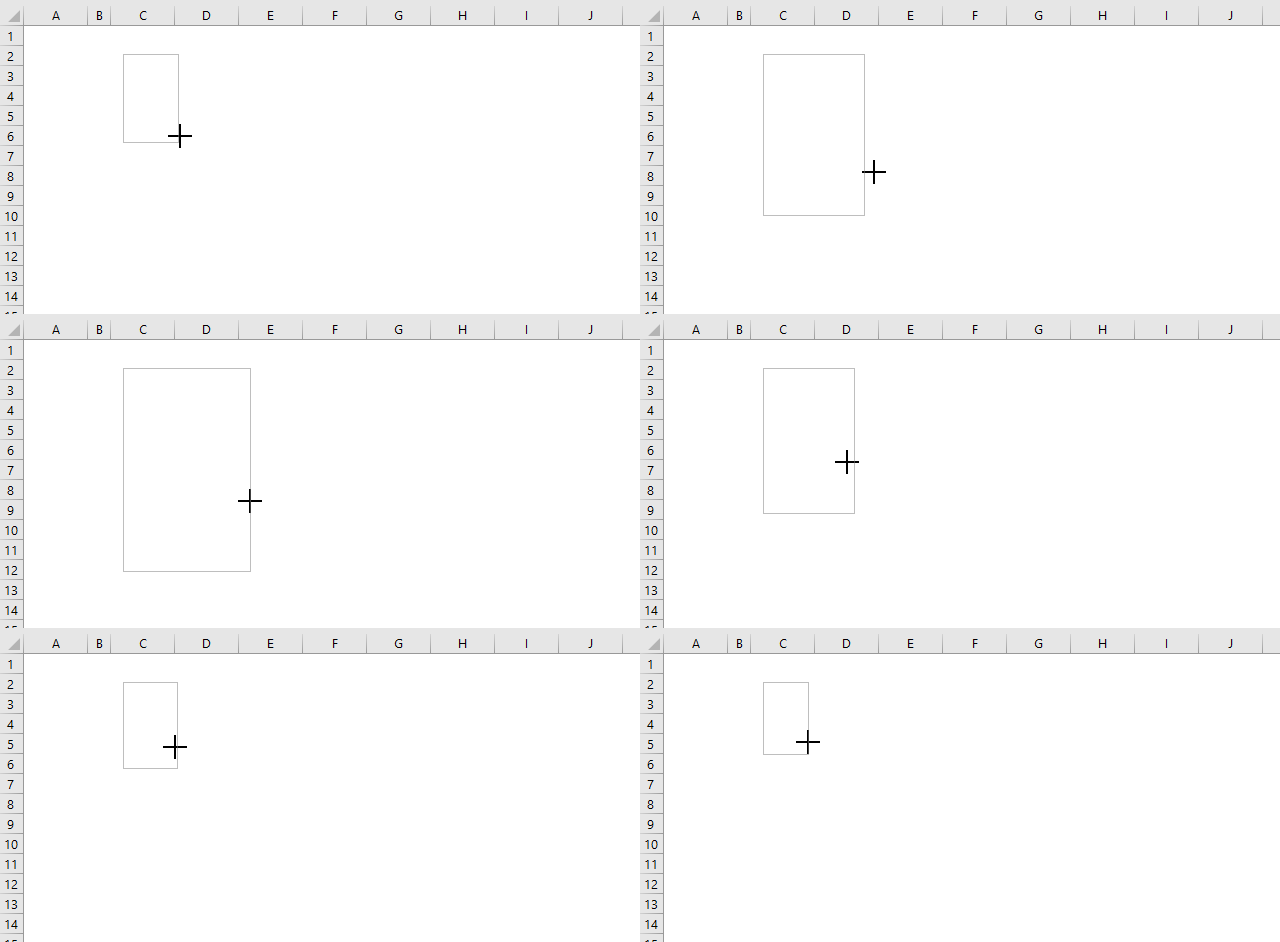
Press and hold with left mouse button on one of the sizing handles, then drag to resize the Scroll Bar. The Scroll Bar disappears, however, an empty box or rectangle shows the new size.
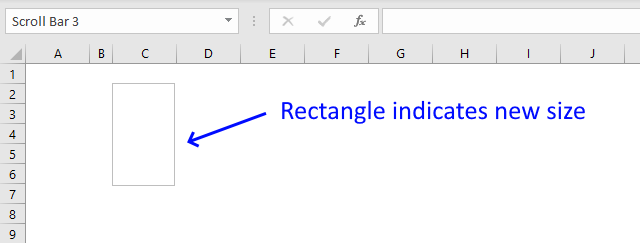
Release the left mouse button and the empty box is replaced with the Scroll Bar.
4. Advanced resizing
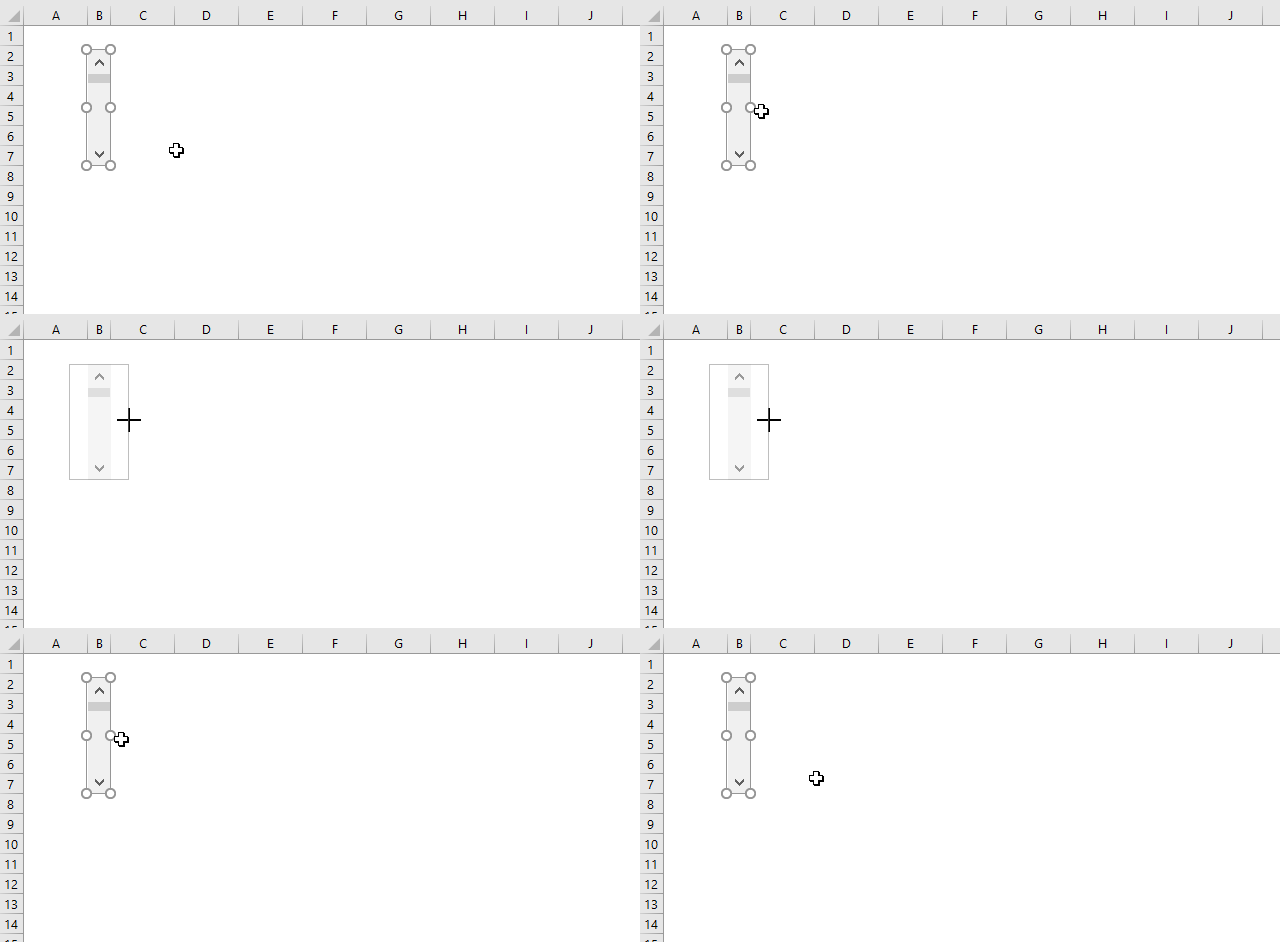
The Shift key lets you keep the proportion between the height and width if you drag one of the four corner sizing handles.
- Press and hold SHIFT key.
- Press and hold with left mouse button on a corner sizing handle.
- Drag with mouse to change the Scroll Bar size.
Press the CTRL key while dragging with mouse to resize parallel sides simultaneously. The animated image above shows resizing a Scroll Bar using the right sizing handle while holding the SHIFT key. Both sides moves while dragging the mouse.
- Press and hold CTRL key.
- Press with mouse on the Scroll Bar to select it.
- Release the CTRL key.
- Press and hold with left mouse button on a sizing handle.
- Press and hold the Shift key.
- Drag with mouse.
- Release left mouse button and the SHIFT key.
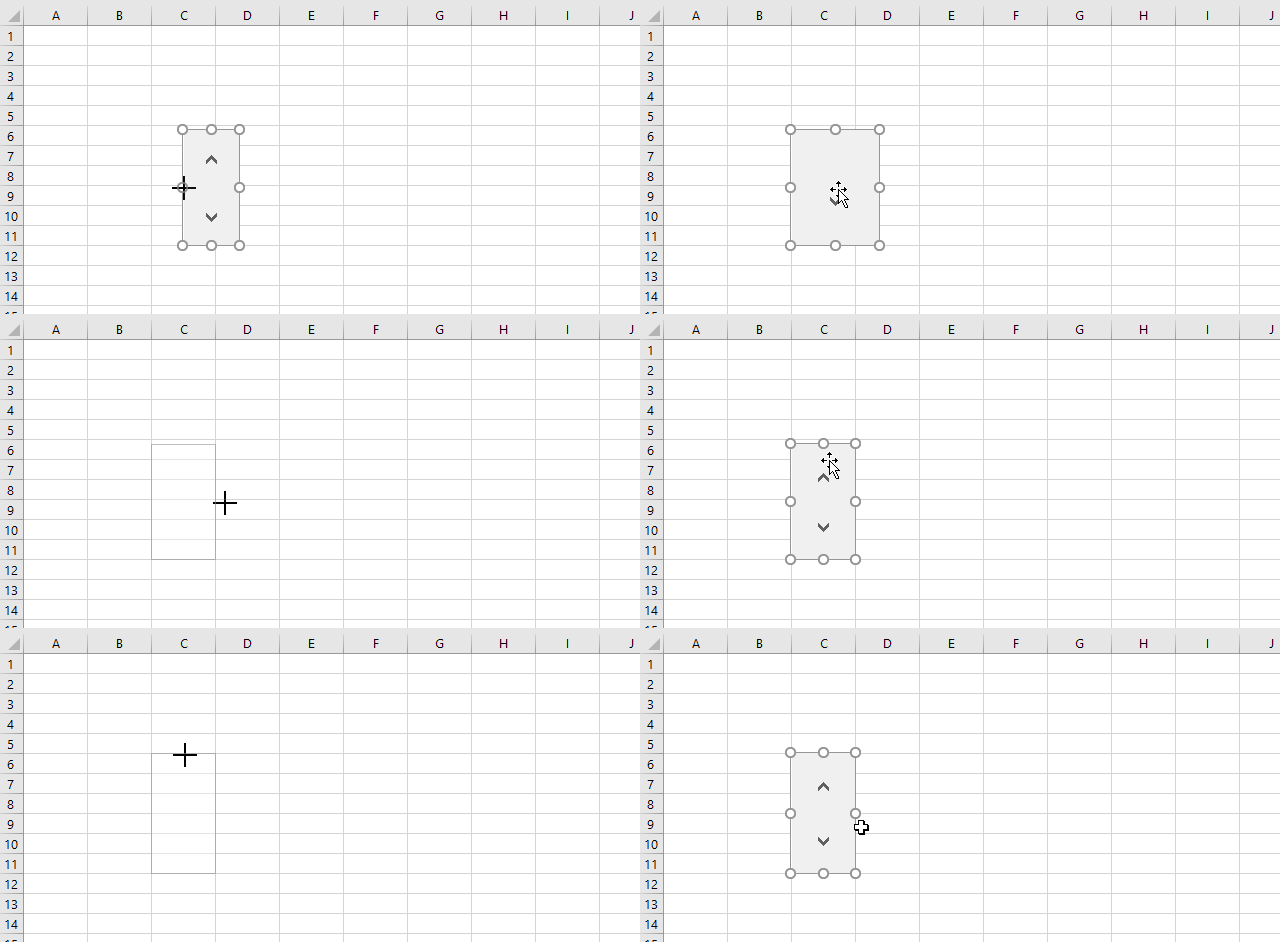
The Alt key lets you align a sizing bar with the cell grid.
- Press and hold CTRL key.
- Press with mouse on the Scroll Bar to select it.
- Release the CTRL key.
- Press and hold with left mouse button on a sizing handle.
- Press and hold the Alt key.
- Drag with mouse to a cell grid line.
- Release left mouse button and the Alt key.
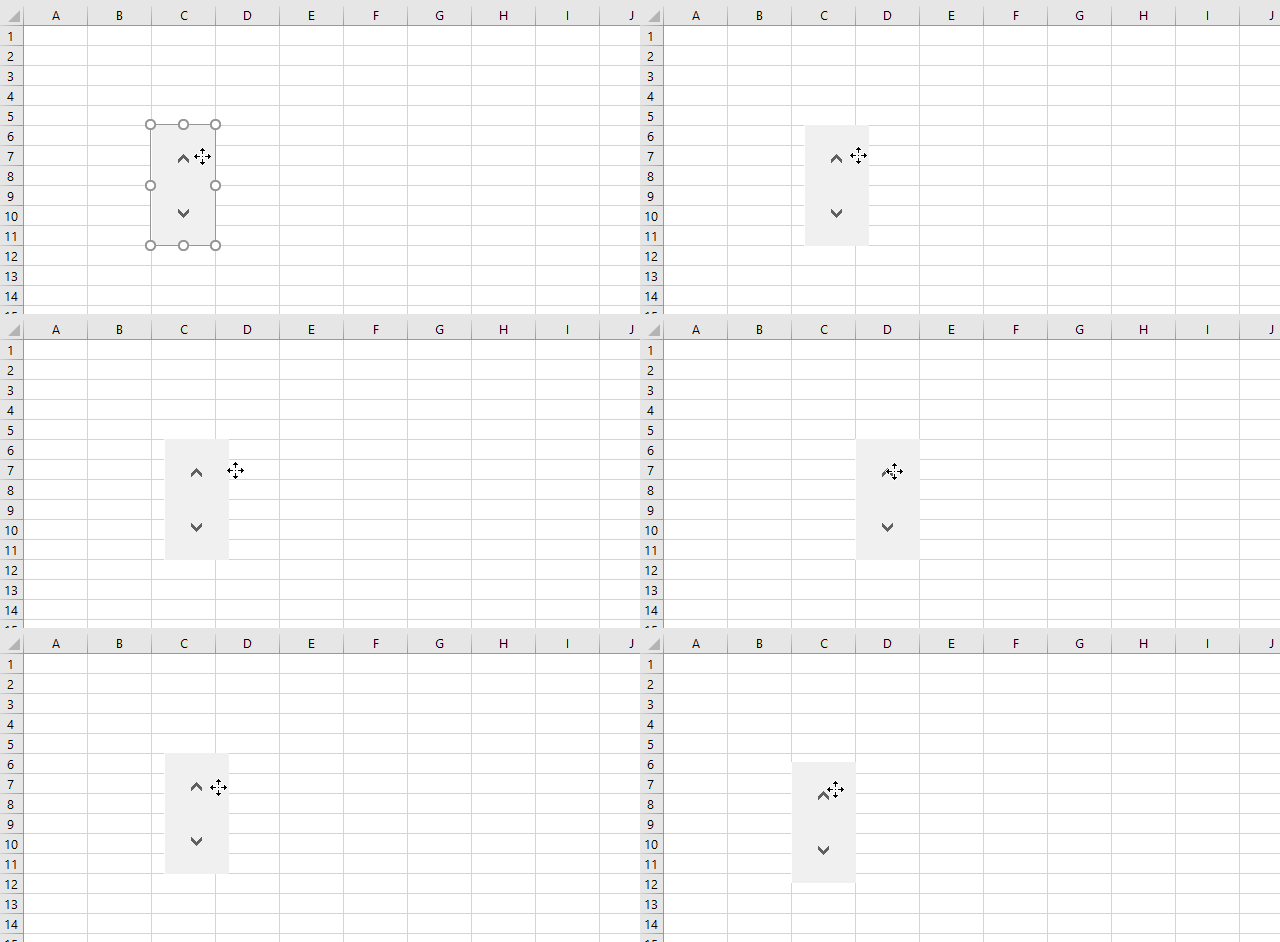
You can also move the entire Scroll Bar using you mouse and the press and hold the Alt key to align one of the sides to the cell grid.
- Press and hold CTRL key.
- Press and hold on the Scroll Bar to select it.
- Release the CTRL key.
- Press and hold the Alt key.
- Drag with mouse to a cell grid line.
- Release left mouse button and the Alt key.
5. How to change Scroll Bar settings
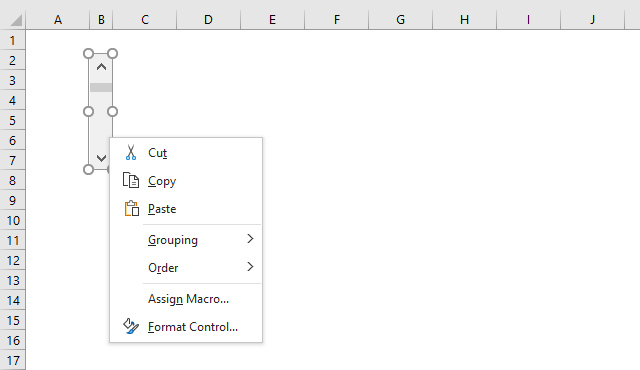
Here is how to access Scroll Bar settings.
- Press with right mouse button on on the scroll bar. A pop-up menu appears, see image above.
- Press with left mouse button on "Format Control...", a dialog box appears.
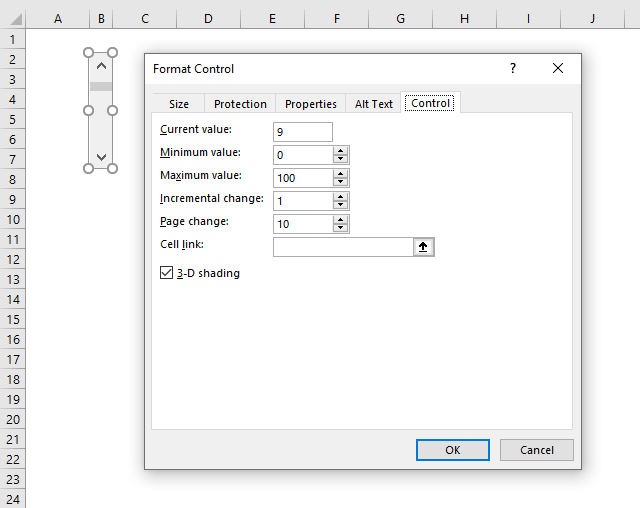
There are five different tabs on the top menu.
- Size
- Protection
- Properties
- Alt text
- Control
The Control tab has 7 settings you can change. The "Current value:" is what the Scroll Bar right now returns. The minimum and maximum value are the limits that the Scroll Bar can operate.
The incremental change is how many steps the scroll bar changes when the user press with left mouse button ons on the upper or lower arrow. The "Page change:" value lets you choose how many that change when you press with left mouse button on below or above the bar.
The "Cell link:" value lets you pick a cell that then shows the current value.
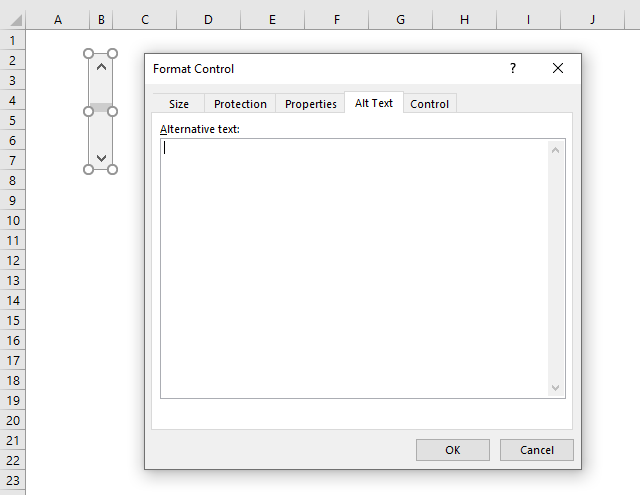
The "Alt text" tab lets you create alternative text meaning it guides people with visual impairments so they know what is shown on the screen. The text will be read by a screen reader.
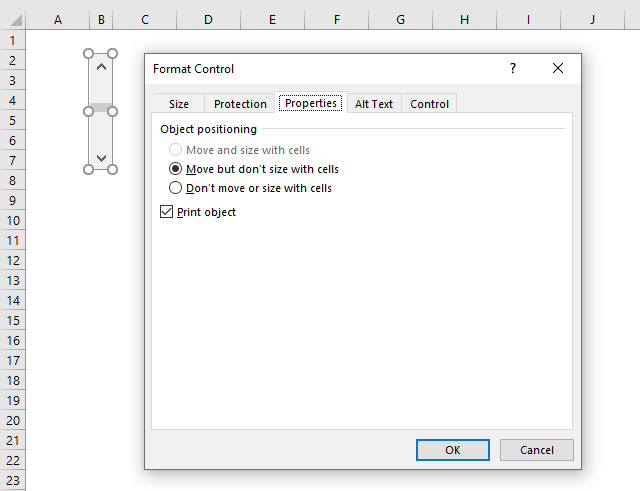
The "Properties" tab lets you choose how Excel will position the Scroll Bar.
- Move and size with cells
- Move but don't size with cells
- Don't move or size with cells
"Move and size with cells" is greyed out by design, you need to insert a Scroll Bar from the ActiveX Controls to use this setting.
"Move but don't size with cells will change the Scroll Bar location if you adjust column or row width/height on the worksheet but not it's size.
The next option is "Don't move or size with cells" and that will leave the Scroll Bar as it is no matter what you do to your cells.
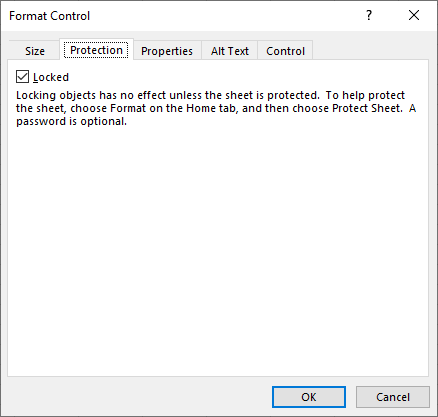
The "Protection" tab contains a checkbox that lets you lock or unlock the Scroll Bar. The default value is locked but it won't be protected until you protect the worksheet. Go to the "Review" tab on the ribbon to access the "Protect sheet" button.
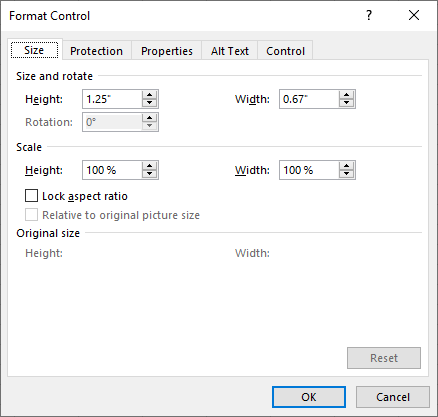
The "Size" tab in the dialog box allows you to adjust the height and width using arrow buttons or enter a value. There is also an option to scale the Scroll Bar based on percentages and to lock the aspect ratio.
The aspect ratio is the proportion between the height and width, if you lock it the proportion stays the same when you change the height and width values. This is the same as holding the SHIFT key while resizing the Scroll Bar with your mouse.
6. Example 1 - Scroll Bar manipulates data
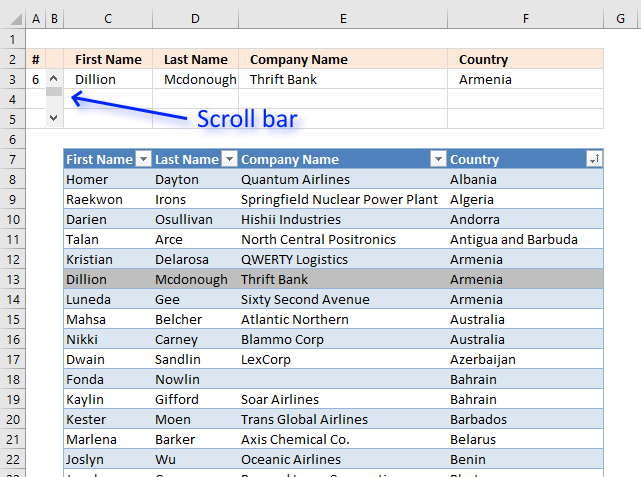
The image above shows a scroll bar in cell range B3:B5, it has an arrow pointing up and another arrow pointing down. There is also a bar indicating where in the data you are.
Row 3 contains a record that is fetched using a formula and based on a number that the scroll bar returns, that number is shown in cell A3. The number changes when you press with left mouse button on the arrows on the scroll bar or press with left mouse button on and drag the bar.
Here is how I did it
Insert a scroll bar
- Go to tab Developer on the ribbon
- Press with left mouse button on "Insert" button
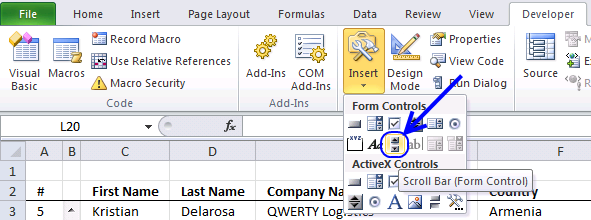
- Press with left mouse button on Scroll bar
- Drag on sheet to create a scroll bar
- Press with right mouse button on on scroll bar
- Press with left mouse button on "Format control"
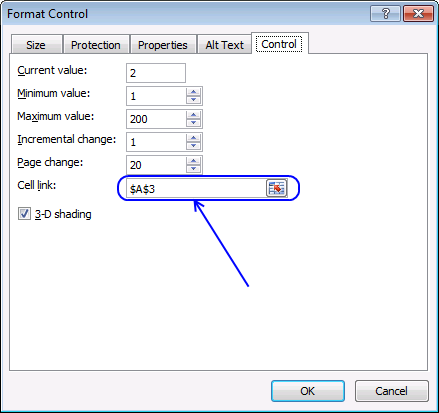
- Change cell link to $A$3
- Press with left mouse button on OK
Array formula in cell C3:F3:
- Select cell range C3:F3
- Type =INDEX(Table15,A3,0)
- Press and hold CTRL + SHIFT
- Press Enter
7. Example 2 - Scroll Bar combined with a chart
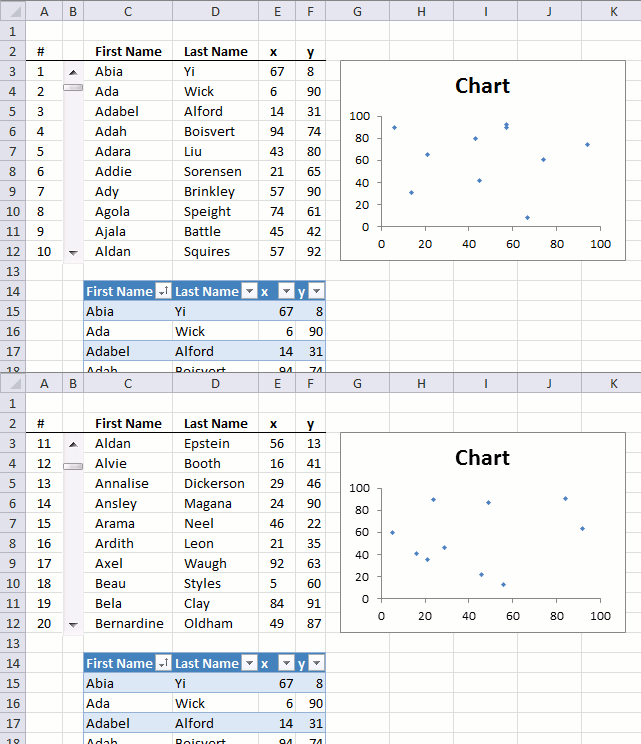
This example shows a scrolling Excel x y scatter chart. The chart data source is linked to cell range E3:F12, when the user press with left mouse button ons on the Scroll Bar the data in cell range E3:F12 changes.
The chart shows this change instantly.
8. Example 3 - Scroll Bar and Conditional Formatting
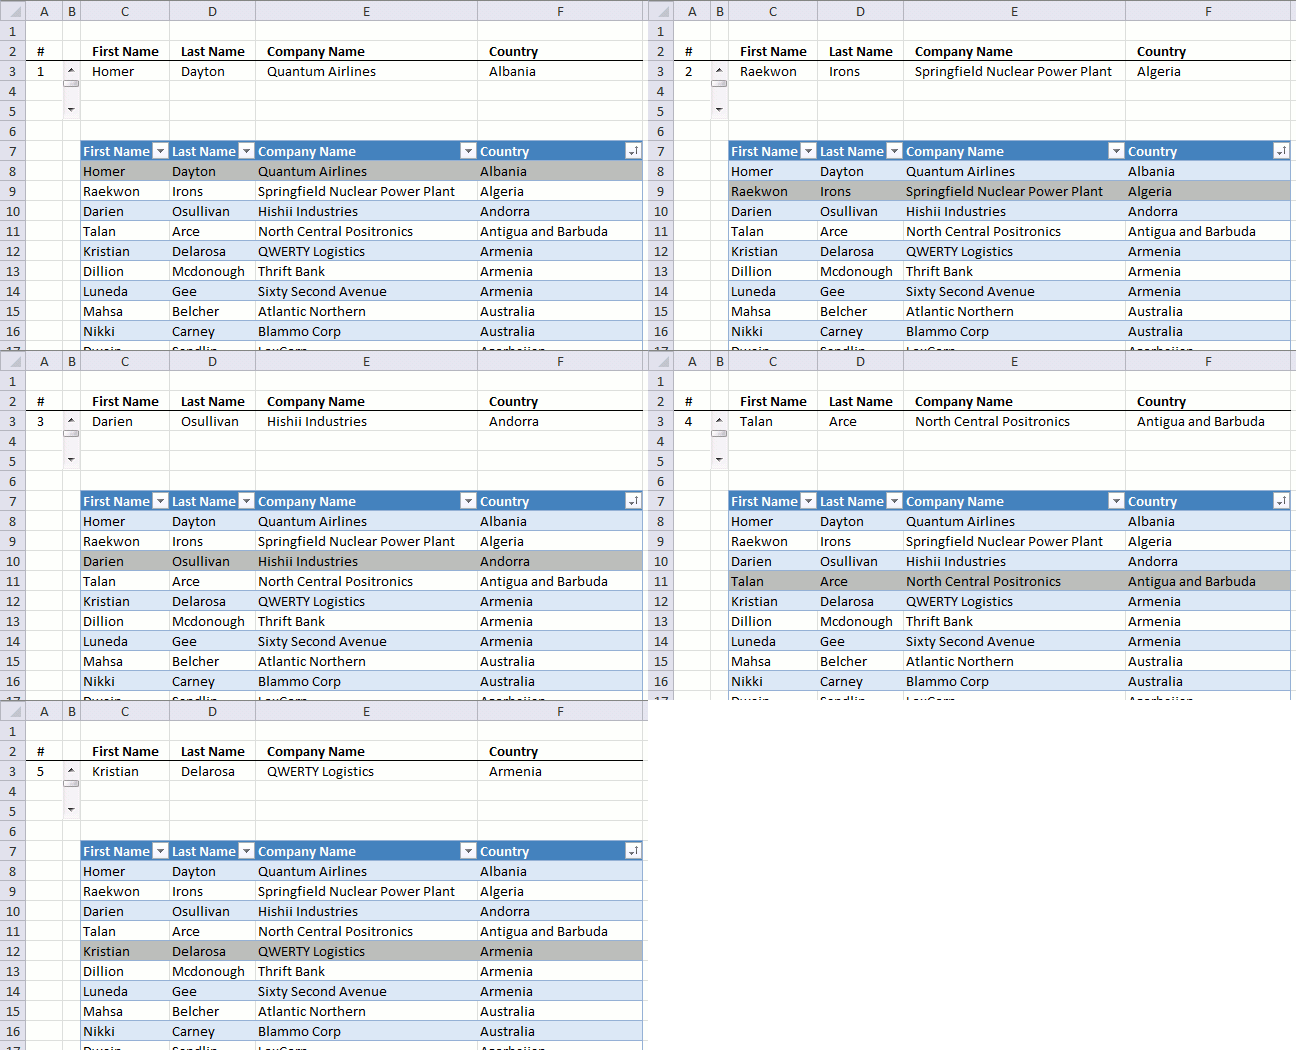
The last example shows conditional formatting highlighting current record.
Conditional formatting formula
9. Use event code to automatically change scroll bar maximum range value
Activating the sheet runs the macro and sets the maximum value for the scroll bar. For example, if you add values to the table and it now has 250 rows. The event macro changes the scroll bar maximum range value to 250.
You don't need to adjust the maximum value for the Scroll Bar, the macro does that for you. This will save you time and make the scroll bar more user friendly.
'Event code is run if the worksheet is activated
Private Sub Worksheet_Activate()

'The With ... End With statement allows you to write shorter code by referring to an object only once instead of using it with each property.
With ActiveSheet.Shapes("Scroll Bar 1").ControlFormat

    'Minimum value is set to 1
    .Min = 1

    'Maximum value is set to the number of rows in the Excel Table
    .Max = Range("Table1").Rows.Count

    'Incremental value is 1
    .SmallChange = 1

    'Page change value is the total number of rows in Excel Table Table1 divided by 10
    .LargeChange = Range("Table1").Rows.Count / 10

    'Scroll Bar is linked to cell A3
    .LinkedCell = "$A$3"
End With
End Sub
9.1 Where to put the code?
- Copy the above event code.
- Press with right mouse button on on the worksheet name you want to deploy event code to. A pop-up menu appears.
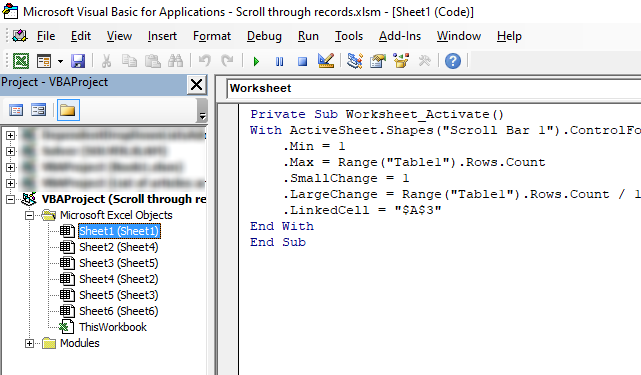
- Press with mouse on "View Code". This will open the Visual Basic Editor, see image above. The corresponding worksheet module opens. The Project Explorer window shows the selected worksheet name meaning it is open.
- Paste event code to the worksheet module.
- Exit VB Editor and return to Excel.
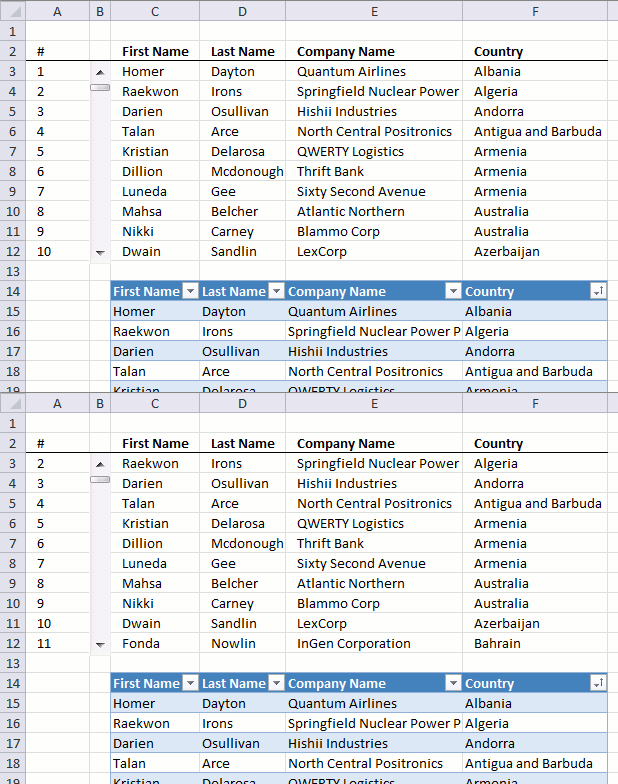
The following example demonstrates scrolling through 10 records at a time. Press with left mouse button oning the scroll bar arrows changes the values in cell range C2:F12.
Formula in cell C3:
Copy cell C3 and paste to cell range C3:F12.
Formula in cell A4:
Copy cell A4 and paste to cell range A5:A12
Table category
Table of Contents How to compare two data sets - Excel Table and autofilter Filter shared records from two tables […]
This article demonstrates different ways to reference an Excel defined Table in a drop-down list and Conditional Formatting formulas. The […]
This article demonstrates two formulas that extract distinct values from a filtered Excel Table, one formula for Excel 365 subscribers […]
Form controls category
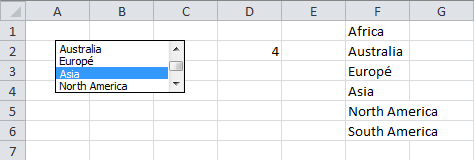
This blog post demonstrates how to create, populate and change comboboxes (form control) programmatically. Form controls are not as flexible […]
This article describes how to create a button and place it on an Excel worksheet, then assign a macro to […]
This blog post shows you how to manipulate List Boxes (form controls) manually and with VBA code. Table of Contents […]
Macro category
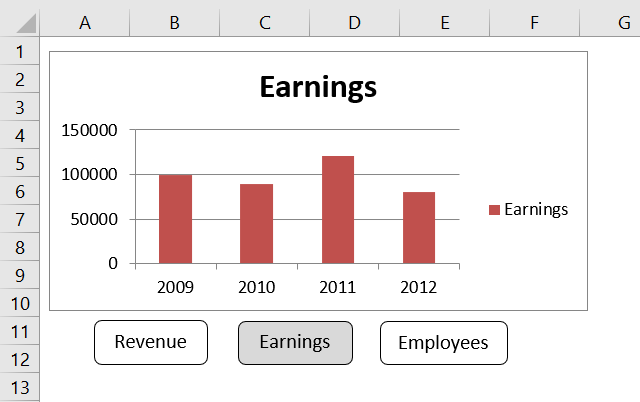
Table of Contents How to create an interactive Excel chart How to filter chart data How to build an interactive […]
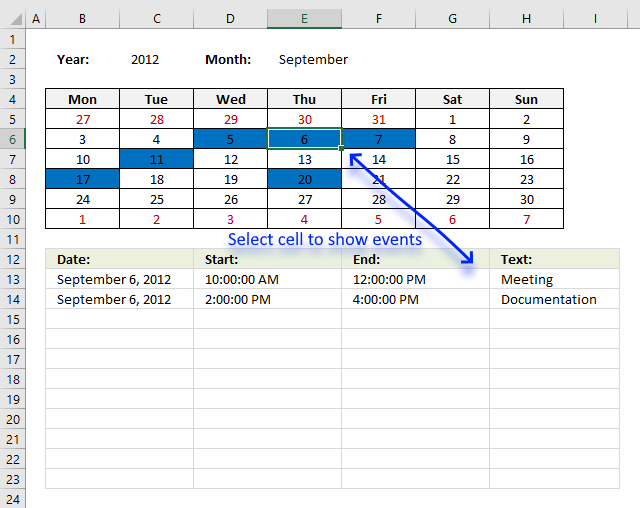
Table of Contents Excel monthly calendar - VBA Calendar Drop down lists Headers Calculating dates (formula) Conditional formatting Today Dates […]
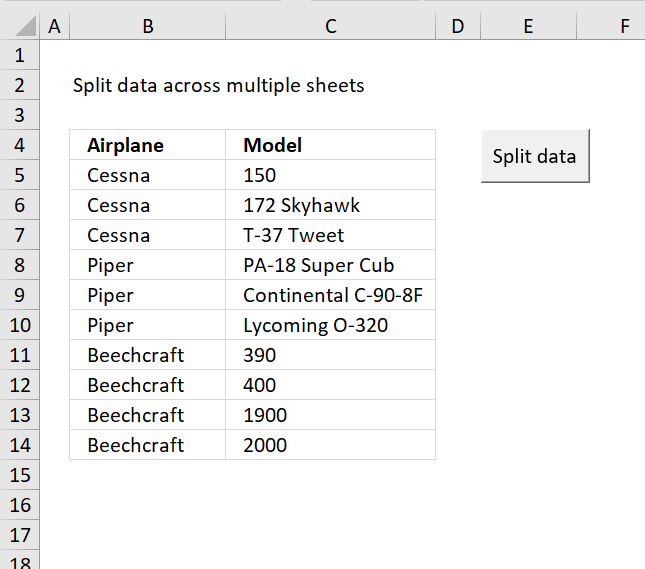
Table of Contents Split data across multiple sheets - VBA Add values to worksheets based on a condition - VBA […]
How to use Excel Tables
Leave a Reply
How to comment
How to add a formula to your comment
<code>Insert your formula here.</code>
Convert less than and larger than signs
Use html character entities instead of less than and larger than signs.
< becomes < and > becomes >
How to add VBA code to your comment
[vb 1="vbnet" language=","]
Put your VBA code here.
[/vb]
How to add a picture to your comment:
Upload picture to postimage.org or imgur
Paste image link to your comment.
